A guide to SPI standards, Mold-Tech textures, and how to specify the right surface finish for your injection molded part.
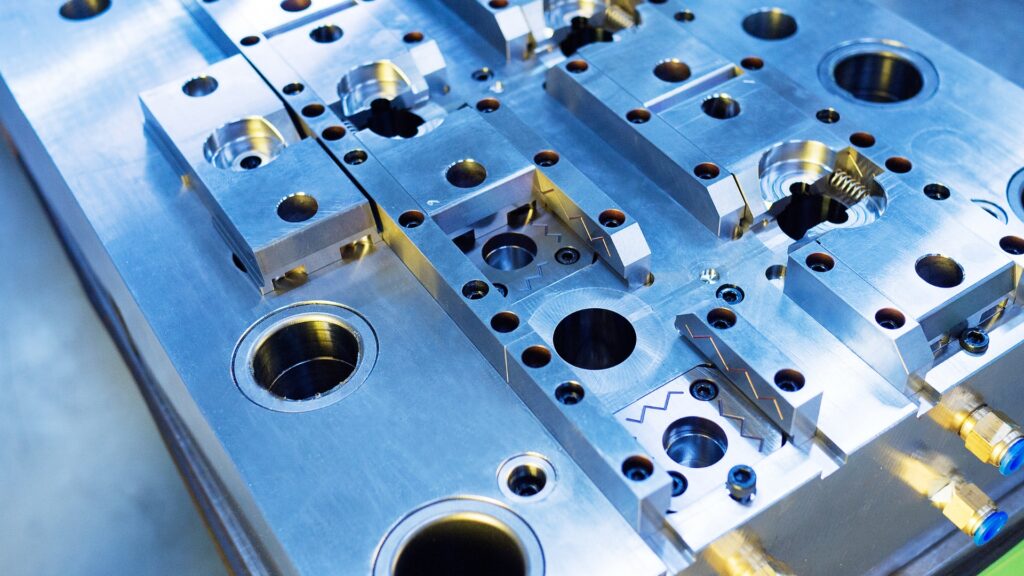
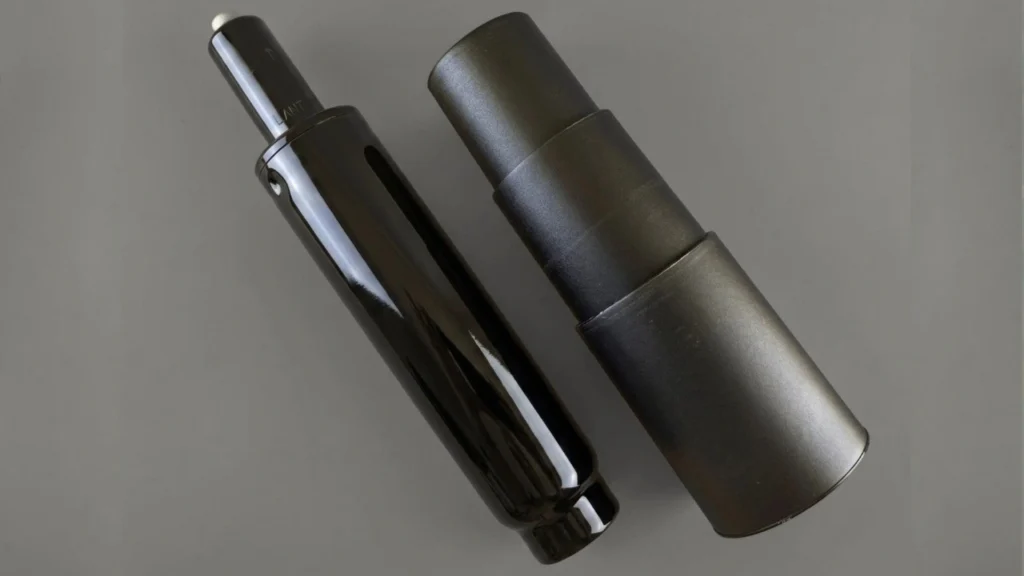
The surface finish of an injection molded part is determined directly by the surface finish of the mold cavity. Polish the mold to a mirror, and the molded part will have a mirror-like surface. Texture the mold with an acid-etched pattern, and every part will replicate that texture.
This direct relationship between the mold and the finished part means surface finish is a tooling decision. It should be specified before the mold is machined because changing the finish, implying additional machining, after steel has been cut can be difficult, costly, or—in the case of some textures—impractical.
This guide covers the standard classification systems for injection molded surface finishes, how those finishes are produced, and how to specify them correctly on engineering drawings and mold specifications to ensure quality stays consistent across every production run of parts.
SPI Surface Finish Standards
The Society of the Plastics Industry, now known as the Plastics Industry Association or PLASTICS, developed a standardized classification system for injection mold surface finishes, providing engineers with a shared vocabulary for specifying tool quality across the manufacturing industry.
SPI finishes are grouped into four primary categories—A through D—with three levels within each category. The classifications range from highly polished optical surfaces to coarse blasted textures. Each level corresponds to a measurable surface roughness value, so finish selection can be tied to numeric data rather than subjective description.
| SPI Finish | Method | Surface Appearance and Typical Use |
|---|---|---|
| A-1 | Diamond-compound polish to a 3-micron finish | Mirror-bright surface for optical applications. This is the highest-cost SPI finish and typically requires the most polishing time. |
| A-2 | Diamond-compound polish to a 6-micron finish | High-gloss surface suitable for transparent parts, consumer products, and high-appearance components. |
| A-3 | Diamond-compound polish to a 15-micron finish | Glossy appearance for cosmetic parts that do not require optical-quality surfaces. |
| B-1 | Paper or emery finish to 600 grit | Semi-gloss surface commonly used for consumer products and general cosmetic components. |
| B-2 | Paper or emery finish to 400 grit | Moderate-gloss surface with slightly more visible machining texture than B-1. |
| B-3 | Paper or emery finish to 320 grit | Low-gloss or slightly matte surface for parts with moderate appearance requirements. |
| C-1 | Fine stonework finish | Uniform matte surface that can help reduce the visibility of knit lines and minor surface imperfections. |
| C-2 | Medium stonework finish | Coarser matte appearance than C-1 for functional or lightly cosmetic components. |
| C-3 | Coarse stonework finish | Rough matte surface generally used for non-cosmetic parts. |
| D-1 | Dry blast with glass bead | Uniform textured matte surface that hides minor imperfections well. |
| D-2 | Dry blast with fine aluminum oxide | More pronounced texture than D-1 for functional or aesthetic applications. |
| D-3 | Dry blast with coarse aluminum oxide | The coarsest texture in the standard SPI classification system. |
Finish Cost Consideration
Highly polished SPI A finishes require more mold preparation, specialized polishing, and careful handling than matte or blasted finishes. Specifying a higher-quality finish than the application requires can increase tooling cost and lead time without improving part performance.
Mold-Tech Textures
SPI standards primarily define levels of polish, stonework, and abrasive blasting. Many molded products, however, require a specific decorative or functional surface pattern rather than a uniform polished or matte finish.
Common molded textures include:
- Leather-grain patterns
- Brushed or directional patterns
- Geometric textures
- Wood-grain patterns
- Fine stippling or pebbled surfaces
- Custom brand or product-specific textures
These patterns are commonly applied to the mold cavity through chemical etching. The selected pattern is transferred to the mold surface using specialized masking and acid-etching processes. Every molded part then reproduces the etched pattern, making mold texturing a critical stage in the overall manufacturing process for finished parts.
Mold-Tech is one of the most widely recognized suppliers of standardized mold texture patterns. Its catalog includes thousands of established patterns as well as custom texture options.
Texture depth is typically measured in micrometers. Fine textures below approximately 10 micrometers may create a subtle grain that is barely visible, while textures above approximately 75 micrometers can create a pronounced visual and tactile pattern.
Critical Draft Requirement
Textured surfaces require more draft than polished surfaces. A leather-style texture approximately 20–30 micrometers deep may require at least 3 degrees of draft per side. Coarser textures of 50 micrometers or more may require 5 degrees of draft or more to keep ejection reliable across high-volume production.
Insufficient draft can cause the molded part to scrape against the textured cavity during ejection, producing drag marks and damaging both the tool and the intended appearance of the finished parts.
How to Specify an Injection Mold Surface Finish
Surface finish requirements should be clearly documented on the engineering drawing, product specification, or mold specification. A complete surface-finish callout should identify both the required finish and the areas of the part to which it applies. Clear documentation reduces back-and-forth with the toolmaker and ensures consistent quality from first-off samples through full production.
Specify the SPI Finish
For polished, stoned, or blasted surfaces, identify the SPI designation and the applicable part surfaces.
For example:
- SPI B-1 on all Class A cosmetic surfaces
- SPI C-1 on non-cosmetic exterior surfaces
- SPI D-2 on internal functional surfaces
Avoid applying a single finish requirement to the entire part unless every molded surface genuinely requires the same appearance.
Specify the Texture Pattern
For etched textures, include the Mold-Tech or equivalent texture pattern number.
For example:
- Mold-Tech MT-11020
- Texture depth: 20 micrometers
- Apply to designated exterior cosmetic surfaces only
Including the pattern number and intended depth reduces ambiguity between the product designer, toolmaker, texture supplier, and injection molder.
Define the Required Gloss Level
Where appearance matching is important, specify a measurable gloss range rather than relying only on subjective terms such as glossy, satin, or matte. Pairing gloss data with a surface roughness (Ra) callout gives toolmakers an objective target instead of a subjective description.
For example:
- 60-degree gloss: 60–70 gloss units per ASTM D523
Gloss measurements are particularly useful when molded components must match an existing product, painted assembly, or adjacent sheet metal bracket or panel in the same assembly.
Identify Cosmetic and Non-Cosmetic Surfaces
Classify the visible surfaces of the part according to their appearance requirements. A common approach is to identify:
- Class A surfaces: Highly visible surfaces with strict cosmetic requirements
- Class B surfaces: Occasionally visible surfaces with moderate appearance requirements
- Class C surfaces: Hidden or functional surfaces with minimal cosmetic requirements
This prevents unnecessary polishing or texturing of hidden surfaces and helps control tooling cost, while protecting the quality of every visible part.
Define Witness-Mark Locations
The parting line, gate, ejector pins, slides, lifters, and inserts can all create visible witness marks on a molded part.
Identify acceptable locations for these tooling features during part and mold design. Moving them after the mold has been completed may require substantial tooling modification, since altering tool steel during the program adds cost and schedule risk.
Surface Finish and Plastic Material Selection
Not every thermoplastic replicates a mold surface in the same way. Resin chemistry, fillers, mold temperature, processing conditions, and flow behavior can all affect the appearance of the finished part. This is why finish specifications should always be reviewed against the resin’s known manufacturing behavior.
| Material | Surface-Finish Performance | Key Considerations |
|---|---|---|
| ABS | Excellent replication of polished, matte, and textured mold surfaces | Readily accepts finishes ranging from SPI A-1 through D-3 and is frequently used for cosmetic housings. |
| Polycarbonate | Excellent replication, including optical-quality finishes | One of the strongest options for SPI A-1 and A-2 surfaces used in lenses, light guides, and transparent components. |
| Polypropylene | Good replication of moderate-gloss and matte finishes | Typically performs well with SPI B and C finishes but may struggle to maintain true optical-quality polish because of its semi-crystalline structure. |
| Nylon | Good replication of semi-gloss, matte, and textured finishes | Surface appearance depends heavily on mold temperature and material condition. A mold that is too cold can produce a dull surface regardless of the cavity finish. |
| PEEK and PEI | Capable of replicating fine finishes under properly controlled conditions | High mold temperatures, often approximately 140–180 degrees C depending on the grade, may be required to achieve the intended surface appearance. |
| Glass-Filled Materials | More limited cosmetic replication than unfilled resins | Glass fibers may become visible at the surface and can create directional flow patterns, reduced gloss, or inconsistent texture. |
Processing Conditions Matter
The mold finish alone does not guarantee the final part appearance. Mold temperature, melt temperature, injection speed, packing pressure, venting, material moisture, and fiber orientation can all affect gloss, texture replication, flow marks, and surface consistency. Process validation during early production is the only reliable way to confirm the mold, material, and process combination meets the target surface roughness and appearance.
Common Surface-Finish Specification Mistakes
Surface-finish problems often begin before tooling is built. Common specification mistakes include:
- Using vague terms: Words such as smooth, glossy, matte, or textured are subjective unless supported by an SPI designation, texture number, gloss range, or approved sample. Similarly, referencing a grit number is more precise than saying “lightly textured”.
- Ignoring draft: Applying a deep texture to a nearly vertical wall can make clean ejection impossible.
- Specifying optical polish unnecessarily: SPI A-1 may add substantial polishing cost when an A-2, A-3, or B-1 finish would meet the product’s appearance requirements.
- Failing to define cosmetic surfaces: The toolmaker may polish or texture surfaces that are hidden, increasing cost without adding value on parts no one will ever see.
- Overlooking gates and ejector pins: Tooling witness marks may appear on visible surfaces unless their locations are defined during mold design.
- Ignoring material limitations: A specified resin may not reproduce the intended gloss or texture consistently.
- Changing the finish after tooling: Some polish adjustments are possible, but deep etched textures can be difficult or expensive to remove.
Frequently Asked Questions
What is the difference between SPI A-1 and A-2?
Both are high-gloss, diamond-polished finishes. SPI A-1 uses a 3-micron diamond compound to produce a mirror-quality surface for optical lenses, light guides, and applications where small imperfections may be visible in reflected or transmitted light.
In numeric terms, A-1 typically corresponds to a very low surface roughness value, while A-2 allows a slightly higher reading. SPI A-2 uses a 6-micron diamond compound. It provides a high-gloss appearance for consumer goods, transparent parts, and cosmetic components that do not require true optical quality. A-2 is generally faster and less expensive to achieve than A-1.
Can surface finish be changed after the mold is built?
Some surface finishes can be changed after the mold is built. A mold finished to SPI B-1 may be polished further to an A-level finish or stoned back to create a matte C-level finish.
Etched textures are more difficult to reverse. Adding texture removes material from the mold surface, and returning that cavity to a polished surface may require welding, re-machining, or replacing the affected insert. Surface-finish requirements should therefore be established before the mold is completed.
Does a textured surface require more draft?
Yes. A textured wall must pull away from the mold without scraping across the etched cavity surface. Fine textures may require only a modest increase in draft, while deep textures may require 3–5 degrees or more per side.
The exact requirement depends on texture depth, material, part geometry, draw direction, and the texture supplier’s recommendations.
Which SPI finish is best for most consumer products?
SPI B-1 is commonly specified for consumer-product housings because it provides a clean semi-gloss appearance without the cost of a diamond-polished A-level finish.
The appropriate finish still depends on the resin, product design, brand requirements, color, gloss target, and whether the surface must hide scratches or molding imperfections.
Can texture hide injection molding defects?
A matte or textured surface may reduce the visibility of minor scratches, knit lines, flow patterns, and small surface irregularities. It will not correct underlying molding defects caused by poor part design, inadequate venting, improper gate placement, material degradation, or incorrect processing conditions.
Surface finish should support the intended appearance, not replace proper part, mold, and process design.